
I’m so excited about this one! Finally, gluten-free flour tortillas!
Really, I don’t need to tell you why flour tortillas are awesome. You either love ’em or you don’t. Me? I’m in the love camp. So it thrilled me (thrilled, thrilled, THRILLED me) when this recipe finally came together.
This recipe makes a chewy, flexible wrap. Ready to begin?
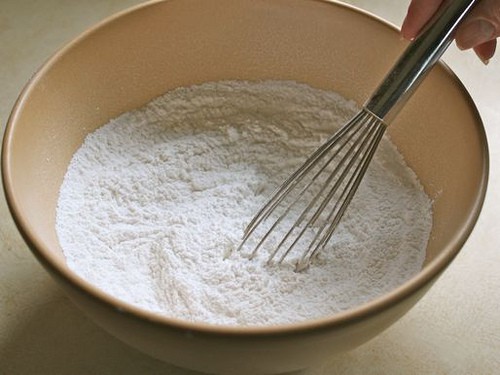
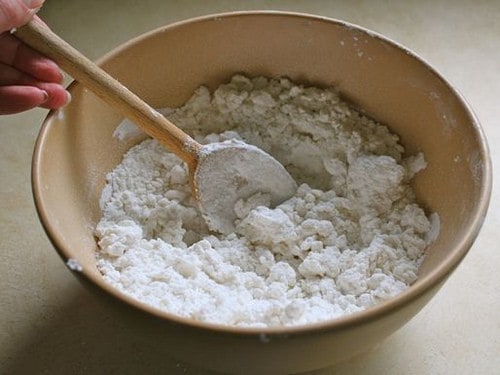
In a medium bowl, whisk together the dry ingredients. Be sure to select a bowl with an opening large enough to reach into. This is important.
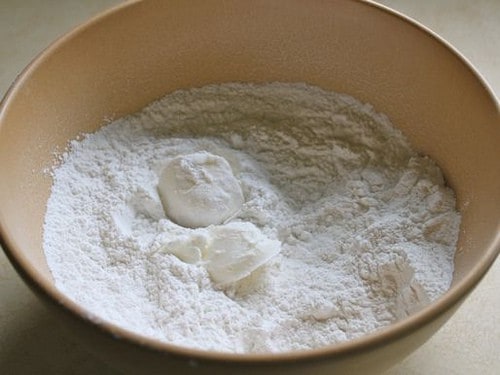
Add shortening or lard. While this recipe is gluten-free, dairy-free, egg-free, and nut-free, it isn’t fat-free. And that’s a good thing! The fat adds a pleasant flavor and texture to the wraps. Don’t skip it!
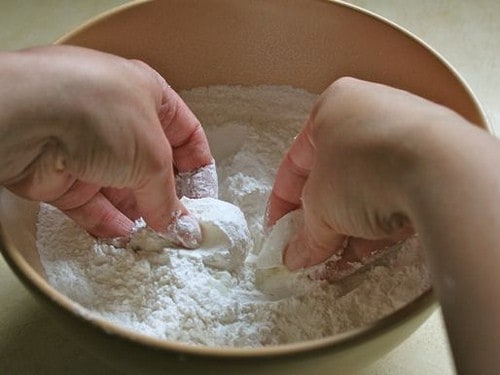
It’s best to do this recipe by hand. Reach right into the bowl and work the shortening into the flour with your hands. A snapping motion of your fingers accomplishes this task quickly. You don’t want any large pieces of shortening to remaining.
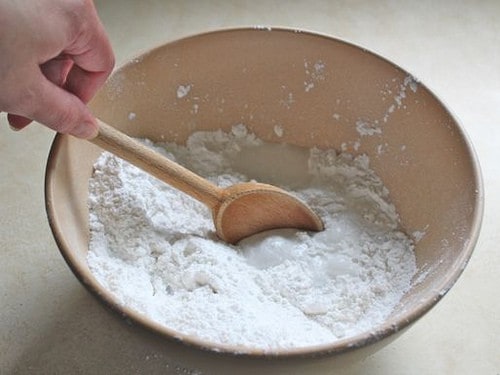
Add the water. At first, just half a cup cold water. Stir it into the flour mixture.
The flour mixture will be dry. VERY dry. This is normal.

Add 1/4 cup additional water. Stir. If the dough just begins to hold together, stop adding water! If the dough remains dry, add another tablespoon or two of water.
You want to add the water slowly. If this dough gets too wet, it’s impossible to work with. Don’t let that scare you! Just be cautious when adding the water and the dough will be fine.
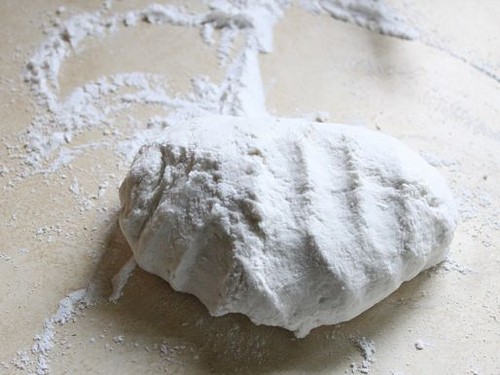
Generously white rice flour your counter. Turn the dough and any dry ingredients that are clinging to the bottom of the bowl onto the counter. Dust your hands with flour and begin to knead the dough.
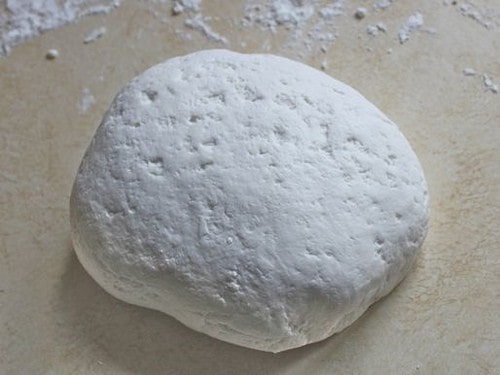
You want the dough to be smooth. If at any point during kneading the dough is wet, knead in more flour. If the dough doesn’t come together, add a splash more water. During this step you really want to feel the dough. The texture you’re looking for is similar to play-doh: damp but not wet.
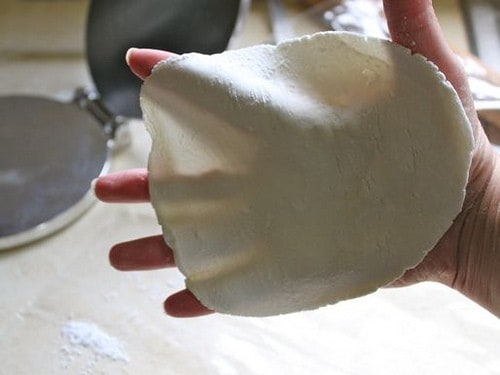
Once you think you’ve got it, pinch off a piece of the dough. Roll it between your palms. It should be easy to handle. You don’t want the dough to stick to your hands or fall apart. Again, think clay or play-doh.
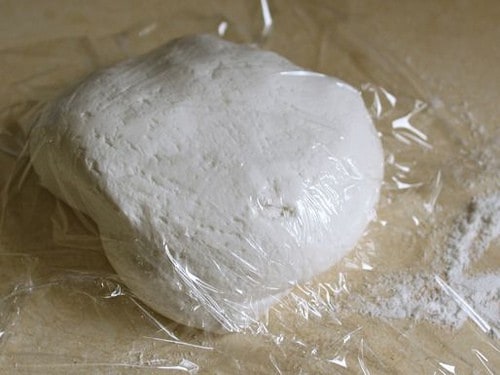
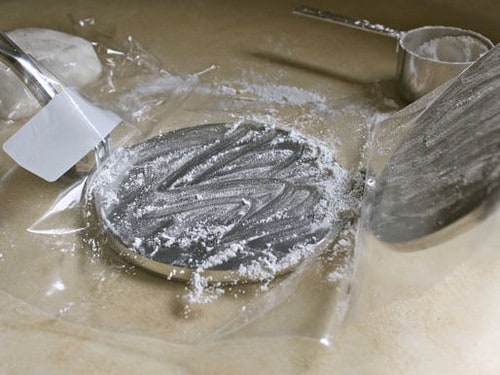
Cover the dough with plastic wrap. This prevents a skin from forming.
Cut open a plastic bag and place it on a tortilla press. Dust the bag with flour. Don’t skip this or the tortilla will stick to the plastic.
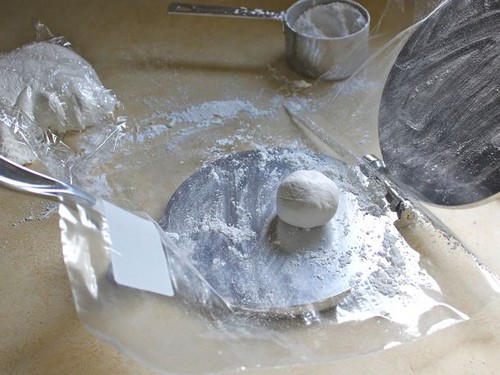
Pinch dough, you want about two tablespoons, and roll into a ball. The dough should not stick to your hands. Place dough into tortilla press. It’s a good idea to place the dough ball closer to the hinge than right in the center. Then simply close the press. The dough flattens under the pressure.
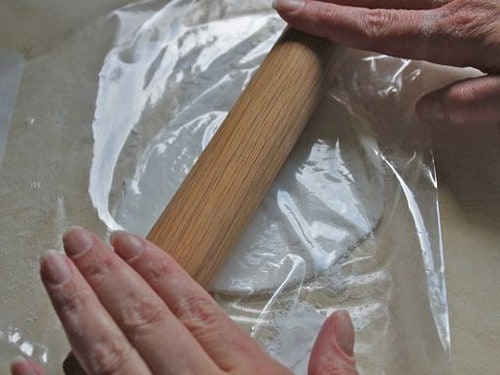
Don’t have a tortilla press? They are worth the investment. But, until you get one, you can make this recipe. Simply slip the dough ball between two pieces of floured parchment paper. Then use a heavy skillet and “squish” down the dough ball.
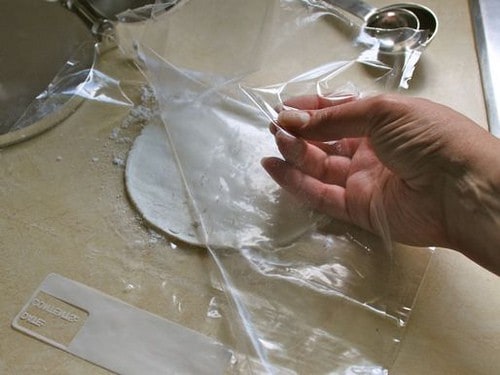
Slide the tortilla–still in the bag– off the press. Gently pull the plastic bag off the tortilla. Go slow. If the dough rips, don’t worry. You can re-roll the dough.
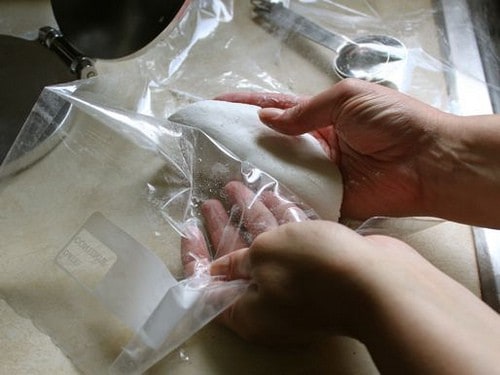
Hold the tortilla in your hand. Pull away the bag. You don’t want to pull the tortilla or it could rip.
Hold the tortilla in your hand. Pull away the bag. You don’t want to pull the tortilla or it could rip.
If your tortilla isn’t as thin as you’d like, re-flour your bag and return the tortilla to the bag. Gently roll out the tortilla.
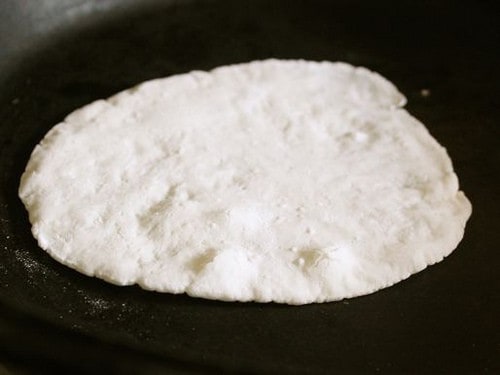
Heat your cast iron skillet until it smokes lightly. Add the tortilla. Cook the first side for about three minutes.
Flip! The second side doesn’t cook as long nor will it get as dark.
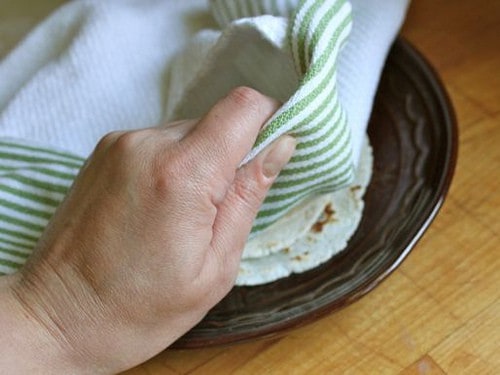
As soon as the tortilla comes out of the pan, place it on a plate under a clean, dry towel. Cover. The steam will soften the tortilla. This is a good thing.

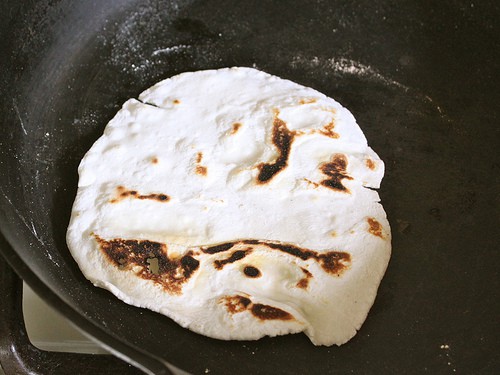
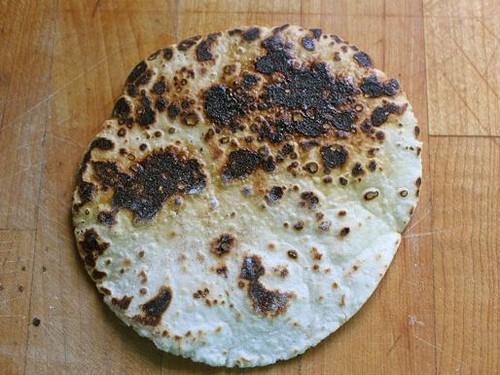
The tortilla shown in the pan above is just a wee bit dark. That’s ok! Adjusting the heat takes some practice. The tortilla above, however, is pretty perfect.
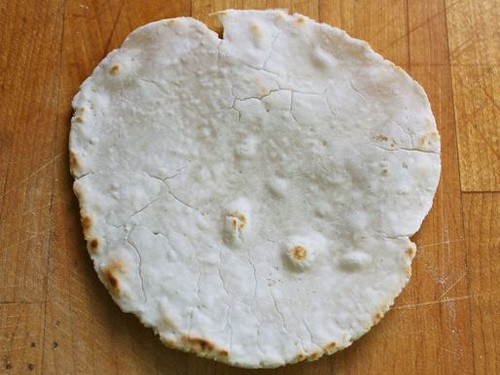
Same tortilla. Different side. As you can see, the second side isn’t as dark. If we cook the second side too much, the tortilla might tip into the “too crisp” stage. At that point, even placing the tortilla under a towel to steam for a minute won’t soften it.
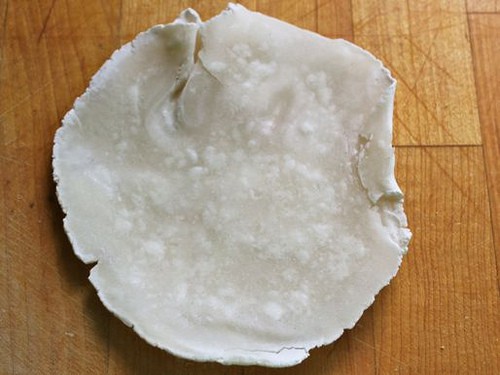
Here’s what you want to avoid. Learn from my mistake! The pan was too hot when I put the tortilla in it. The resulting tortilla almost burnt. If you get a tortilla or two like this, reduce both the heat under the pan and your cooking time.
And here the pan was too cold. The tortilla did cook but it’s anemic. If your tortilla looks like this, increase the heat under the pan.
If you are new to making tortillas, you might have a few that aren’t “just right.” That’s ok. (Well, it’s a bummer in the moment.) With practice, you’ll get the hang of it. In fact, try making a “play” batch first. You don’t want a wonderful meal waiting for your first batch of homemade flour tortillas.
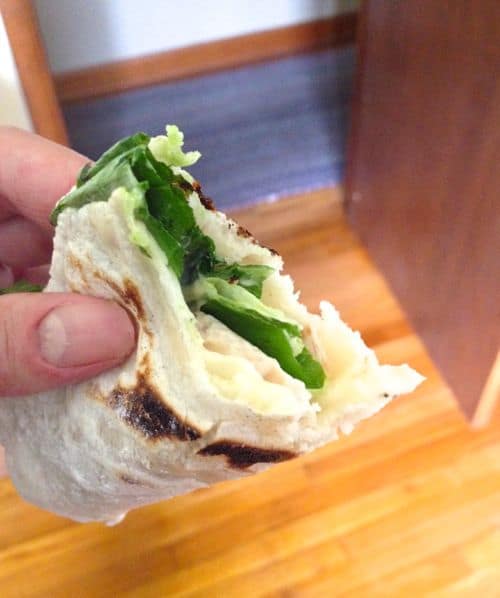
If you make a play batch, you could throw in, say, some lettuce, turkey, and lettuce. And you will LOVE it. I promise.
Or you could just stare at the plate of tortillas you made and beam with pride. That’s a good option too!

How to Make Gluten-Free Flour Tortillas
Ingredients
- 1 1/2 cups white rice flour (6 ounces; 170 grams)
- 1/2 cup tapioca starch (2 ounces; 57 grams)
- 1 teaspoon xanthan gum
- 1/2 teaspoon baking powder
- 1/2 teaspoon salt
- 2 tablespoons shortening or lard (1 ounce; 28 grams)
- 3/4 cup ice water, plus more as needed (6 ounces; 170 grams)
Instructions
-
In medium bowl, whisk together white rice flour, tapioca starch, baking powder, xanthan gum, and salt.
-
Using your hands, cut in the shortening. Do this by using a snapping-like motion with your fingers. No large pieces of shortening or lard should remain.
-
Add 1/2 cup cold water. Stir with a wooden spoon. Dough will be dry. Add another 1/4 cup water. Stir. Feel the dough. If it starts to hold together and feels damp, stop adding water. If the dough feels dry, add another two tablespoons water. Repeat until dough is moist but not wet.
-
Generously white rice flour your countertop. Turn dough out onto counter. Flour your hands lightly with white rice flour. Gather dough into a ball. Knead the dough until smooth. If the dough is too wet, knead additional white rice flour into it; if the dough feels dry, knead a splash more water into it. You want the dough to be easy to work with. Pull off a little. Roll it between your palms. It should not stick or fall apart. The dough's texture should be similar to clay or play-doh.
-
Cover dough with plastic wrap. This prevents a skin from forming.
-
Heat 10-inch cast iron skillet (non-stick pans don't work well. They don't get hot enough.) over medium heat. While skillet heats, line a tortilla press with a cut open plastic bag. (Only cut open the bag on two sides. The "hinge" of the bag should line up with the hinge of the press.) Dust the bag with white rice flour. Pinch off a dough ball, about two tablespoons. Roll dough into a ball.
-
Place the dough ball into the press and close to flatten. Slide the bag off the tortilla press. Gently pull the bag away from the tortilla. Lift the tortilla into your hand. Pull away the second piece of plastic. If the tortilla seems thick (which doesn't happen too often), dust the bag with flour, return the tortilla to the bag. Dust the top of the tortilla, cover, and roll out a little.
-
Increase the heat under the skillet to medium-high if the skillet isn't smoking lightly. Place the tortilla into the skillet. Cook, about three minutes, until the tortilla is golden brown.(As your first tortilla cooks, begin pressing out the next tortilla.) Flip. Cook an additional minute. Remove and place hot tortilla onto a plate. Cover with a clean, dry towel.
-
Repeat. Tortillas are best enjoyed right away. You can store them overnight in a sealed bag. Reheat by placing into a warm skillet.
Maybelle says
Your instructions are great and easy. I used to make homemade flour tortillas, it’s been a few years. All the little details in your directions are really good. There is a difference. With flour I used warm water, other than that, the way you say to add ingredients and how the dough should feel is great!
Denise Miller says
My celiac hubby had thought flour tortillas were lost to him after diagnosis. The ones you can buy in the store are gummy.
I made these tortillas tonight and used them for quesadillas. Words like “phenomenal” and these tortillas are a keeper” among others were used.
Thank you for the recipe. My hubby is very happy.
Amanda Hemberger says
What do you use as vegetable shortening? I have crisco on hand.
Elizabeth says
Criso will work very well!
Karin says
These are excellent; very similar to the corn/AP flour ones I usually make. My daughter will be so happy when she comes home for lunch. Glad I came across your website yesterday.
Patricia says
I don’t have vegetable shortening. Can I use butter?
Elizabeth says
Yes! The texture will be a little different but that will work.
Daren Lee says
use butter rather than lard, its much better.
Craig says
Worked really well! The tortillas where both crunchy and chewy. Personally I prefer mine on the chewier side. The consistency of the dough was a bit tricky to get down, but adding more flour helped.
I’ll dock a star because the recipe and introduction was needlessly long, but at least it worked well.
Mary says
Loved the extra comments and hints. Very helpful and useful. Many times recipes do not provide hints and /or things that can possibly go wrong. Thank you!
Diann Cook says
Directions are clear and easy to follow. The pictures are a big help. Even the comments about what fat can be used are helpful.
Toni says
I love this recipe. I substitute and put about 1/4 cup of sorghum flour and maybe 1/4 cup of brown rice flour. The sorghum flour gives them such a great taste. I just like to ‘play’ around with recipes. They may not be as pliable. I heat mine in the oven in foil after sprinkling them with water.
I also use vegan Earth balance margarine.
I eat these every day and they are so good!!
Shelli Rodican says
Can’t wait to try some of the recipes